We started by buying a book and then I decided that I would make a book bag for it to go in. Basically I was looking for an excuse to use the fabulous fabric I bought with my nephew in mind. Apparently pirates are all the rage in their household at the moment so I bought some skull and crossbones fabric and got busy with the rotary cutter and mat.
I cut out 2 pieces of exterior fabric with heavy weight interface ironed on and 2 pieces of lining fabric that were sized 16" x 14". I sewed the exterior with right sides facing inwards along the sides and bottom edge. I sewed the lining fabrics in the same way but left a gap along half of the bottom edge. I pressed all the seams open.
I turned the lining fabric out so the right side faced outwards. I then inserted this bag inside the exterior fabric and lined up the top edges to that the right side of both sections faced each other and pinned them. I sewed around the top edge and then put my hand through the hole in the bottom of the lining, pulled the exterior fabric through the hole and turned the bag the right way out. I then sewed the bottom edge of the lining before inserting the lining inside the bag and pressing the seams.
I then put eyelets into the bottom corners of the bag and around the top edge. This was my first time using eyelets and in the end I abandoned the eyelet gadget and simply bashed the eyelets closed with a hammer. It seems to have worked fine!

I used cord threaded through the eyelets at the top of the bag and threading the cord through a bead on the outside of the bag at the centre and back of the bag to ensure the cord threaded through all the eyelets evenly.

To attach the cord to the bag, I threaded the cord through each bottom eyelet and stitched the cord together using zig zag stitch. I then slipped another bead over the cut end to hide it.

The bag is pretty strong because of the lining and the interfacing and I hope this means it will stand up to everything a small boy can throw at it, because I really like the bag and I think my nephew will too.

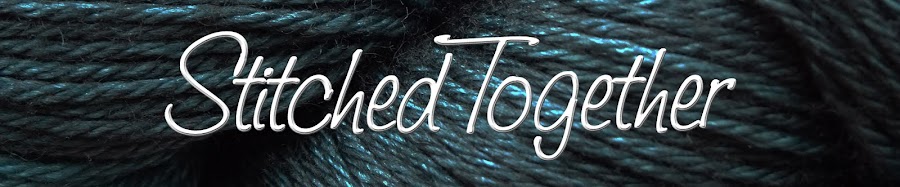
He can wear it either over one shoulder,
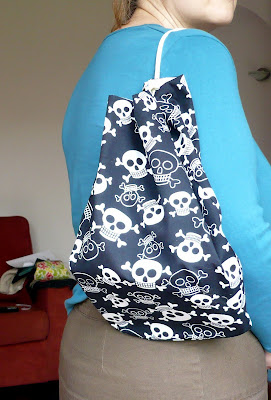
...or rucksack style to keep his hands free.
I was really happy with the finished article and may make other bags in this vein to use as project bags. I may have a hunt through my fat quarter collection and see what I can come up with as I am feeling a little inspired now!